My scrappy set in circle with no pins! Tutorial
What you need:
-2 sheets of freezer paper cut to size or near finished block. Mine is 10.5"
-compass to draw circle or circle ruler
-washable glue
-starch and small container or lid, brush
and old cardboard piece almost as big as your block
Fold one piece of freezer paper in half and again to get center
draw circle
mark the fold lines with pen or pencil because they will get pressed away in a minute.
Layer the 2 pieces evenly on top of each other with wax side down.
The top one with your drawing on will get melted to the bottom paper and the bottom paper will stick to your ironing surface slightly.
Press with warm dry iron. They will slightly bubble but will stick together.
Now with paper scissors cut out your circle on the line. Make it smooth as this is your folding line soon.
Take your block and fold and press in half and again. Use your freezer paper marks to line up with the block marks and center on block.
When lined up press the waxy side to the wrong side of your block.
Cut out center of your block leaving about 3/8" to 1/2" of block fabric to fold back.
Next clip around your opening but do not clip all the way to freezer paper or it will fray on front eventually.
Use your paintbrush next and pour a bit of starch into small lid. Dip and wet clipped edges. Do not saturate a ton as it will loosen the freezer paper. You need just enough to press and hold.
If you use a steam iron you may not need the starch but you will lose the waxy grip on your freezer paper sooner and I plan to reuse this template many times!!
While your fabric is damp with starch use your fingers to roll back over the template and press till dry. Watch out for your fingers it gets hot.
Next you need your extra cardboard. Draw a circle that is about 1.25 to 1.5" bigger than the circle you cut out of freezer paper and discarded. It will be bigger to help make it easier to center and sew. Use your own judgement. Lay it on scrap slab and cut loosely around the cardboard. Press your scrap piece nice and flat.
Place a small line of washable glue around the turned back clipped inner edge. Not to close or you will have glue slopped to the front side.
Center circle over your turned back opening. Press so the glue dries. Check on the front to make sure you have your block how you want it.
Now is the time to peel up the freezer paper carefully from your block and turned back clipped edges. Gently because if you used too much glue your paper will tear and it won't want to come off. Remember I said light application of glue. :)
Ready to sew. This is my zipper foot. My needle has to be moved all the way to the left. See the crease in the green fabric next to the clipped edges? this is where you want your needle to sew. My foot is not very visible but I know the edge of the foot needs to cover the line in order for the needle to be in the right place. Adjust yours accordingly.
Notice that scrap circle is down and I am folding back the block edges. You will have to lightly tug that back and out of the way to sew.
Another version is the roller foot. It is for leather sewing usually. Notice with this foot you can set the wheel right on the line and see where the needle goes down. I like this version but it doesn't have the pressure down like other feet do. It is just an option if you have the foot. Sew the same way tugging lightly to get block fabric out of the way.
Trim around the circle and then press block from the front.
Nice and flat. This circle is about 6.5" but you can do this with any size.
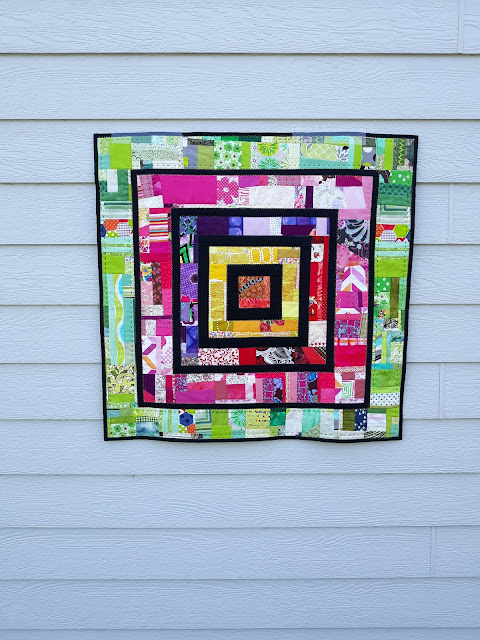
This is a wall-hanging I made many years ago for a patone color challenge. The circles are about 1.75" big.
I hope this tutorial helped you to try set in circles. Let me know if you try it.
If you would like a video version similar to how I did this you can check out Christina Cameli here. Hers is slightly different and her block has lots of seams so she skips the clipping and starch. I think in this case that is the best way to go with no clips in among the seams.


Comments